A quick insight into how I used Adobe PS and AE to animate a Dutch old Master Painting.
In anticipation of the (critically underwhelming) film — The Goldfinch, that was released in September 2019, Warner Bother’s partnered up with the global auction house Sotheby’s to host a variety of media and PR events. I was tasked with producing a fun instagram post that brought the 17th Century Dutch paining to life.
Here’s the finished result:
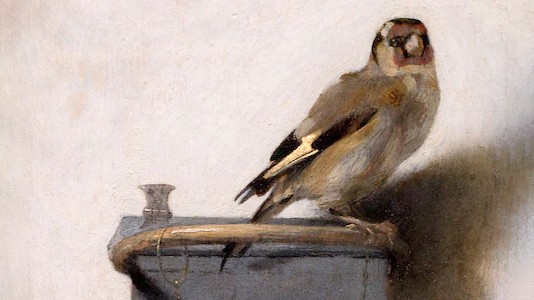
First thing, here’s the original image:
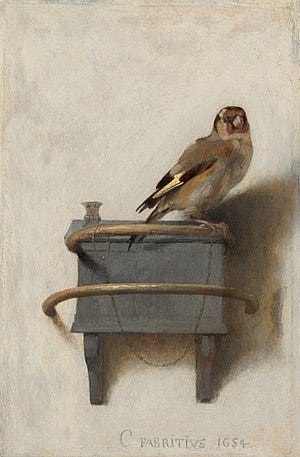
The Goldfinch, Carel Fabritius, 1654
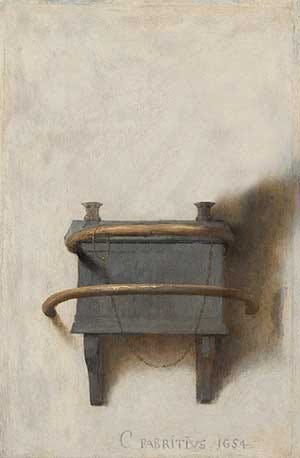
Step 1: Isolating the bird from the background – I knew I wouldn’t be able to animate the actual painted bird, so I had to remove it entirely from the frame. After an hour or so in Photoshop I had a clean plate to work with.
Step 2: Finding the perfect piece of stock footage that would match up with the pose. Fortunately, we live in a day and age where basically any stock video you could ever want exists on the internet somewhere in some shape or form. After a lengthy trawl through Shutterstock I came across the below clip, which I decided was going to be good enough.
Step 3: Stabilising the clip, removing the background and compositing together. The branch wobbles a bit so I ran a simple stabilisation through the After Effects tracker module to keep the feet in exactly the same position. Then I was able to key out the background, the footage aligned pretty well right from the start so there wasn’t a great deal of work needed in terms of positioning. Here’s the output before any extra edits were made:
Step 4: Tidying and polish. This was probably the most laborious part, I needed to make it feel like the bird was really in the scene and had been hand painted. Firstly, the feet were moving too much for my liking so I ended up using a freeze frame to keep it still and fixed to the perch. I also had to manipulate the outline of the original painted bird so the morph was as seamless as can be. You can definitely tell when it transitions into the stock footage, but by using the outline as an alpha matte I was able to make it pretty smooth. I then added a bit of realistic shadow to match the uplighting of the perch and removed the unwanted branch.
Finally, to give it that painted / stop motion feel I slowed the whole thing down to 12fps, exported my edited bird as a png sequence and applied a photoshop dry brush filter to every frame. Bringing the whole thing into Premiere to recompile and add some sound design, I hit export and that was done!
Just a quick overview of a fun day’s work — nothing super technical here, but if you want to find out more about the process please do leave a comment.
Here’s the finished thing again: